Buying an electric vehicle is exciting, but nothing beats the convenience of charging it right at home. If you’ve been plugging into a standard wall outlet, you already know how slow that can be. A Level 2 EV charger can cut your charging time by more than half, letting you wake up every morning to a full battery.
Here in Sacramento, with our hot summers and mild winters, having a home charging setup isn’t just a luxury, it’s practical. You avoid busy public chargers, you charge when rates are low, and you keep your EV ready for weekend trips up to Lake Tahoe or down to the Bay.
Today, I’m going to walk you through exactly how to install a Level 2 EV charger at home, step-by-step. We’ll cover what you need, what to watch out for, and why working with a licensed electrician in Sacramento is key.
Table of Contents
What is a Level 2 EV Charger?
Before we jump into the installation steps, let’s get clear on what we’re talking about.
A Level 1 charger uses a standard 120-volt outlet, the same one you’d plug your phone charger into. It’s fine for topping off your battery, but painfully slow for a full charge.
A Level 2 EV charger uses a 240-volt circuit, similar to what powers your electric dryer or oven. This extra voltage means your EV charges 4–6 times faster than with Level 1.
For most Sacramento homeowners, a Level 2 setup is the sweet spot. You get fast charging without needing the costly infrastructure of a commercial DC fast charger.
Step 1: Choose the Right Charger for Your Needs
Here’s the thing, not all Level 2 chargers are created equal. Some have smart features like Wi-Fi connectivity and scheduling. Others are bare-bones but reliable.
Consider these factors:
- Charging speed: Look for amperage that matches your EV’s maximum AC charging rate.
- Cable length: If your garage layout is tricky, you may need a longer cable.
- Weather rating: If you’re installing outdoors, make sure it’s rated for Sacramento’s summer heat and occasional winter rain.
- Smart features: Apps, energy monitoring, and utility rate scheduling can save money.
Pro tip: Check your EV manufacturer’s recommendations. Some brands certify certain chargers for optimal performance.
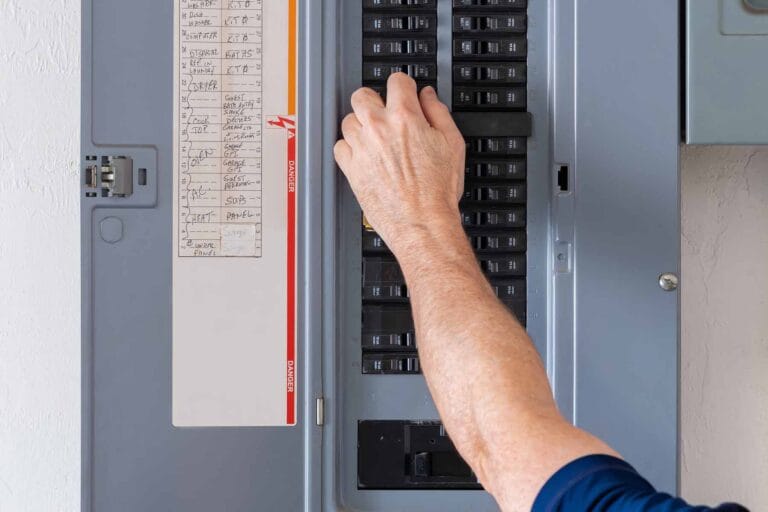
Step 2: Assess Your Electrical Panel
Installing a Level 2 EV charger in Sacramento often comes down to one thing, whether your panel can handle it.
Level 2 chargers typically require a dedicated 240-volt circuit rated for 30–60 amps. If your panel is already maxed out with existing appliances, you may need an upgrade.
At Old Town Electric, we’ve worked on homes in Midtown, Land Park, and Natomas where the panels dated back decades. In those cases, adding a charger meant upgrading the panel to modern capacity.
What we check during an assessment:
- Available breaker slots
- Panel amperage rating (usually 100–200 amps)
- Condition of existing wiring
- Distance from panel to installation location
Step 3: Pick the Best Installation Spot
Think about where your EV is parked most often. For most Sacramento homeowners, that’s the garage. But in neighborhoods like East Sacramento or Curtis Park, street or driveway parking may require an outdoor installation.
Factors to consider:
- Proximity to your electrical panel (shorter runs cost less)
- Protection from direct sun in summer
- Space to safely mount and coil the charging cable
- Accessibility for future vehicle upgrades
If outdoor installation is necessary, we use weatherproof conduit and enclosures to protect wiring from both heat and moisture.
Step 4: Get the Proper Permits
Here’s what a lot of DIY guides skip, permits. In Sacramento County, installing a Level 2 EV charger usually requires an electrical permit, even if it’s a relatively simple job.
Why? Because pulling a permit ensures your installation meets National Electrical Code (NEC) requirements and local building standards. It’s also important for insurance and resale value.
Old Town Electric handles this process for you, working with the Sacramento Building Department to schedule inspections and provide documentation.
Step 5: Run the Wiring and Install the Circuit
This is where having a licensed electrician matters most. We’ll:
- Shut off power to the panel for safety.
- Install a dedicated breaker sized for your charger.
- Run conduit and wiring from the panel to the charger location.
- Mount the charger securely on the wall or pedestal.
- Connect wiring according to manufacturer specs.
In homes with finished walls, this might mean fishing wire through tight spaces or using surface-mounted conduit. In garages, we can often run it cleanly along walls.
Step 6: Inspection and Activation
Once the wiring is complete, the city inspector checks that everything meets code. Passing inspection means you can start charging immediately.
We’ll walk you through how to use the charger, set up any smart features, and connect it to your Wi-Fi if applicable.
How Much Does a Level 2 EV Charger Installation Cost in Sacramento?
Every home is different, but here’s a general breakdown:
| Item | Cost Range |
|---|---|
| Charger Unit | $400–$900+ |
| Permits | $100–$250+ |
| Standard Installation | $500–$1,000+ |
| Panel Upgrade (if needed) | $2,500–$4,000+ |
Example: Last month, we installed a Level 2 charger for a Natomas homeowner. The charger cost $650, installation was $850, and the permit was $175. Total: $1,675, done in one day.
Benefits of a Level 2 Charger at Home
Let’s talk about why Sacramento homeowners love their Level 2 chargers:
- Faster charging: 20–30 miles of range per hour vs. 3–5 with Level 1.
- Convenience: Plug in at night, drive all day.
- Lower charging costs: Take advantage of SMUD’s off-peak rates.
- Future-proofing: Ready for your next EV, which might have a bigger battery.

Can You Install a Level 2 EV Charger Yourself?
Technically, yes. But unless you’re experienced with electrical work, it’s not worth the risk. A 240-volt circuit can be dangerous if installed incorrectly, and mistakes can void your charger warranty, or worse, cause a fire.
Sacramento homeowners who hire Old Town Electric get peace of mind knowing the work is done safely, to code, and ready for inspection.
Local Tip: Plan for the Heat
One thing unique to Sacramento? Summer heat can push garage temperatures well over 100°F. We recommend choosing a charger rated for higher temperatures and installing it in a shaded or ventilated area to prolong its lifespan.
Step-by-Step Summary
Here’s your quick reference:
- Select your charger (features, speed, weather rating)
- Check your panel for capacity
- Choose installation location (garage, driveway, carport)
- Pull permits through the city
- Install dedicated circuit and mount the charger
- Pass inspection and start charging
Why Work with Old Town Electric?
We’ve been serving Sacramento for years, from East Sac to Elk Grove, helping homeowners modernize their electrical systems. EV charger installation is one of our specialties. We handle everything, from helping you pick the right charger to dealing with permits and making sure your system can handle it.
We’re local. We know SMUD’s rate plans, Sacramento’s permitting process, and how to work around the quirks of older homes.
If you’re ready to install a Level 2 EV charger at home, call Old Town Electric today or schedule your installation here.